Hello Everyone, Air fryers have taken the culinary world by storm, promising to deliver delicious and healthier fried food with less oil. While these kitchen appliances have revolutionized home cooking, many people wonder if they come with the dreaded downside of being hard to clean. In this user-friendly guide, we’ll explore the ins and outs of cleaning your air fryer, debunking myths, and providing practical tips to make the process a breeze.
The Basics of Air Fryer Cleaning
Let’s address the elephant in the room right away – cleaning an air fryer isn’t as intimidating as it may seem. In fact, with a few easy-to-follow steps, you can keep your air fryer spick and span without breaking a sweat.
- Cool Down: After cooking, allow your air fryer to cool down. Attempting to clean it while it’s still hot can be risky and uncomfortable.
- Unplug and Disassemble: Always unplug your air fryer before cleaning. Most air fryers have removable parts like the basket, tray, and pan. Take these out and wash them separately.
- Hand Wash or Dishwasher?: Check the manufacturer’s instructions to determine if your air fryer accessories are dishwasher-safe. If they are, using a dishwasher can save you time and effort. If not, simply hand wash them with warm, soapy water.
- Dealing with Stubborn Stains: If you notice stubborn food residues or stains, soak the parts in warm, soapy water for a few minutes before gently scrubbing with a soft sponge or brush. Avoid abrasive materials that could damage the non-stick coating.
- Wipe Down the Interior: Use a damp cloth or sponge to wipe down the interior of the air fryer. Be cautious around the heating element – it’s sensitive.
- Exterior Cleaning: Don’t forget to clean the exterior of your air fryer with a damp cloth to remove any splatters or spills.
- Regular Maintenance: Make it a habit to clean your air fryer after each use. This prevents build-up and ensures it’s always ready for your next culinary adventure.
Common Myths About Air Fryer Cleaning
Let’s dispel some common misconceptions about cleaning air fryers:
Myth 1: Air Fryers are a Nightmare to Clean
Contrary to popular belief, air fryers are not inherently difficult to clean. As long as you follow the recommended cleaning steps and stay on top of maintenance, it’s a straightforward process.
Myth 2: You Need Special Cleaning Products
You don’t need fancy cleaning products to keep your air fryer clean. Basic dish soap, warm water, and a soft sponge or cloth are usually sufficient.
Myth 3: Air Fryers Are Not Dishwasher-Friendly
Many air fryer accessories are dishwasher-safe, so you can save time by letting your dishwasher do the work. Just be sure to check the manufacturer’s instructions for guidance.
Myth 4: Cleaning Takes Forever
Cleaning your air fryer takes only a few minutes of your time, especially when you make it a routine. It’s a small effort compared to the delicious, guilt-free meals you can create.
Why air fryers can be hard to clean?
Cleaning an air fryer can sometimes feel like a daunting task, and there are several reasons why it might be perceived as challenging. However, understanding these factors and adopting a user-friendly approach can make the cleaning process much more manageable.
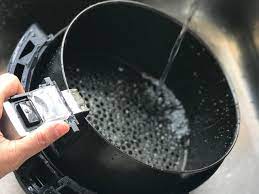
1. Grease and Oil Build-Up: One of the primary reasons air fryers can be hard to clean is the accumulation of grease and oil. When you cook foods in an air fryer, they release oils and fats that can splatter and cling to various parts of the appliance. Over time, this buildup can become stubborn and difficult to remove. To combat this, it’s crucial to clean your air fryer regularly, ideally after each use, to prevent the buildup from becoming a major issue.
2. Small and Compact Design: Air fryers are designed to be compact and efficient, which is excellent for cooking but can make cleaning a bit tricky. The small spaces and intricate components, such as the heating element and fan, can be challenging to access and clean thoroughly. To overcome this, you may need to use specialized tools like brushes or Q-tips to reach tight spots.
3. Non-Stick Coatings: Many air fryer baskets and trays come with non-stick coatings to prevent food from sticking during cooking. While this is beneficial for cooking, it can pose challenges during cleaning. Scrubbing these surfaces too vigorously or using abrasive materials can damage the non-stick coating, reducing its effectiveness over time. To avoid this, opt for gentle cleaning methods and avoid metal utensils that could scratch the surfaces.
4. Electrical Components: Air fryers have sensitive electrical components, such as the heating element and fan, which must be handled with care during cleaning. These parts should never be submerged in water, and it’s essential to unplug the appliance before cleaning to ensure safety. Use a damp cloth or sponge to wipe down the interior, being cautious around these sensitive areas.
5. Time-Consuming: Cleaning an air fryer can be perceived as time-consuming, especially when compared to the quick cooking times they offer. However, the time spent cleaning is a small trade-off for the convenience and health benefits they provide. By incorporating regular cleaning into your cooking routine, you can minimize the time and effort required for each cleaning session.
6. Learning Curve: For those new to air fryers, there might be a learning curve when it comes to cleaning. Understanding which parts are removable, dishwasher-safe, or require hand washing can be confusing initially. However, reading the manufacturer’s instructions and following a routine cleaning checklist can simplify the process over time.
In summary, while cleaning an air fryer may seem challenging at first, it’s primarily about understanding the appliance’s design and adopting good cleaning habits. Regular maintenance, gentle cleaning methods, and a bit of patience can make the process much more user-friendly. By addressing grease and oil buildup, navigating the compact design, protecting non-stick coatings, respecting electrical components, and investing time in learning the cleaning process, you can ensure that your air fryer remains a convenient and enjoyable kitchen appliance. Remember, the delicious and healthier meals it prepares are well worth the effort!
Tips and tricks for cleaning an air fryer
Cleaning an air fryer may seem like a daunting task, but with the right tips and tricks, it can be a breeze. Here, we’ll share some user-friendly advice to help you keep your air fryer spotless and in excellent working condition.
1. Regular Maintenance is Key: The first tip is simple but incredibly effective – make cleaning your air fryer a routine. After each use, allow the appliance to cool down, unplug it, and then disassemble the removable parts like the basket, tray, and pan. Cleaning these components promptly prevents stubborn buildup and makes the process much more manageable.
2. Use Hot, Soapy Water: For most air fryer accessories, a gentle soak in hot, soapy water is sufficient to loosen food residues and grease. Avoid harsh chemicals or abrasive materials, as they can damage the non-stick coating. Instead, opt for a soft sponge or cloth to wipe away the grime.
3. Be Mindful of the Heating Element: When cleaning the interior of your air fryer, take extra care around the heating element and fan. These components are sensitive and should not come into contact with water. Instead, use a damp cloth to wipe them down gently. If you notice stubborn residue, a damp cloth with a bit of vinegar can be helpful, but ensure it’s not dripping wet.
4. Don’t Forget the Exterior: The exterior of your air fryer can also accumulate splatters and spills. Wipe it down with a damp cloth to maintain its pristine appearance. Avoid abrasive cleaners that could damage the surface.
5. Know What’s Dishwasher-Safe: Check the manufacturer’s instructions to determine which parts of your air fryer are dishwasher-safe. Typically, the removable accessories like the basket and tray can be safely cleaned in the dishwasher. Using the dishwasher can save you time and effort, making the cleaning process more convenient.
6. Use a Brush for Tight Spots: Air fryers can have tight spots that are challenging to reach with a cloth or sponge. A soft-bristle brush or an old toothbrush can be a handy tool for cleaning these nooks and crannies. It’s especially useful for cleaning the mesh of the heating element.
7. Address Stubborn Stains: If you encounter stubborn stains or residues, a mixture of baking soda and water can work wonders. Make a paste, apply it to the problem areas, and let it sit for a few minutes before gently scrubbing with a non-abrasive sponge or brush.
8. Remove Lingering Odors: If your air fryer retains food odors, place a bowl of baking soda or activated charcoal inside the appliance and leave it overnight. This will help absorb any lingering smells.
9. Check the Vent: Occasionally, check the vent at the back of the air fryer for any debris or blockages. Clearing this area ensures proper ventilation and efficient operation.
Must Read:-
Conclusion
In conclusion, air fryers are not hard to clean when you know the right steps. With a user-friendly approach, you can maintain your air fryer in top-notch condition without any hassle. Remember to unplug, disassemble, and hand wash or use the dishwasher when appropriate. Don’t be discouraged by myths – cleaning your air fryer is a small price to pay for the convenience and health benefits it offers. So, go ahead and enjoy your crispy, guilt-free favorites, knowing that clean-up is a breeze!