
Hello Everyone, Cleaning the crumb tray of your toaster is a simple yet crucial task that ensures your appliance functions optimally and prolongs its lifespan. Over time, bread crumbs and debris accumulate in the crumb tray, which can not only affect the toaster’s performance but also become a potential fire hazard.
To keep your toaster in top condition and enjoy delicious, crumb-free toast, follow this step-by-step guide on how to clean the crumb tray effectively:
How to clean the crumb tray of a toaster?
Step 1: Safety First Before starting, ensure your toaster is unplugged and completely cool to avoid any risk of burns or electric shock. Safety should always be a priority when cleaning any electrical appliance.
Step 2: Remove the Crumb Tray Carefully slide out the tray from the toaster’s base. If your toaster lacks a removable tray, gently tilt the toaster over a trash bin to dispose of loose crumbs.
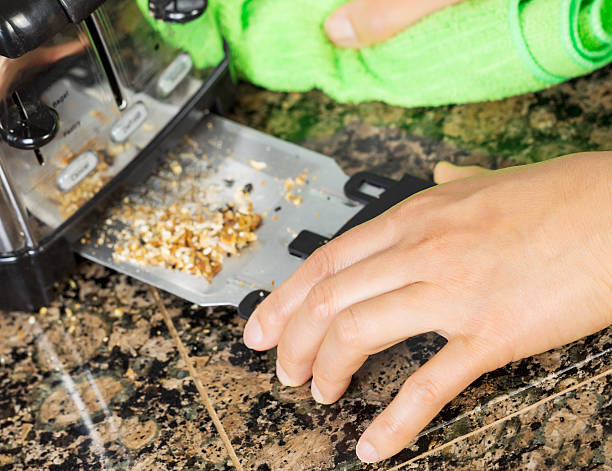
Step 3: Dispose of Crumbs Take the crumb tray to a sink or trash bin and shake off the crumbs. Dispose of them properly to prevent any mess. Consider using a small brush or pastry brush to remove any stubborn crumbs stuck to the tray.
Step 4: Wash the Crumb Tray For removable crumb trays, wash them with warm soapy water. Use mild dish soap and a soft sponge or cloth to scrub away any residue. Rinse the tray thoroughly and let it dry completely before reinserting it into the toaster.
Step 5: Cleaning the Toaster While the crumb tray is drying, gently turn the toaster upside down over a trash bin to remove any additional crumbs or debris that may have accumulated inside the toaster slots. Avoid using sharp objects or utensils to prevent damage to the heating elements.
Step 6: Wipe the Exterior With a slightly damp cloth, and wipe down the exterior of the toaster to remove any dust or grime. Pay attention to the control buttons and dials to ensure they are clean and functioning properly.
Step 7: Reassemble the Toaster Once the crumb tray is dry, carefully slide it back into place at the bottom of the toaster. Ensure it fits securely to avoid any accidental spills or crumbs escaping into the toaster.
Step 8: Regular Maintenance To maintain a clean and efficient toaster, make it a habit to clean the crumb tray every few uses or whenever it becomes visibly dirty. Regular maintenance will prevent the build-up of crumbs and ensure consistent toasting performance.
By following these steps to clean the crumb tray of your toaster, you’ll not only enjoy crumb-free and perfectly toasted bread but also prolong the life of your appliance. Keeping your toaster clean and well-maintained ensures it operates at its best, providing you with delicious toast for many breakfasts to come. Remember, a little maintenance goes a long way in preserving the performance and functionality of your toaster. Happy toasting!
If you are planning to buy a toaster then you should read this review:- Cusimax 2-Slice Toaster Review
Frequently Asked Questions!
Ans – It’s recommended to clean the crumb tray after every few uses or whenever it becomes visibly dirty. Regular cleaning prevents the build-up of crumbs and ensures optimal toaster performance.
Ans – No, it is crucial to clean the crumb tray only when the toaster is unplugged and completely cool to avoid the risk of burns or electric shock.
Ans – For most toasters, the crumb tray is safe to wash in the dishwasher. However, always refer to your toaster’s user manual for specific cleaning instructions to avoid any potential damage.
Ans – Use warm soapy water and a soft sponge or cloth to clean the crumb tray. Avoid using abrasive materials or harsh chemicals to prevent damage to the tray’s surface.
Ans – If your toaster lacks a removable crumb tray, carefully tilt the toaster over a trash bin to dispose of loose crumbs. Use a small brush or pastry brush to remove any stubborn crumbs stuck inside the toaster slots.
Also Read:-
- How to Adjust Your Toaster Settings?
- Are Toasters Energy Efficient?
- Are Sunbeam Toasters Good?
- Are Plastic Toasters Safe?
- Are Whall Toasters Good?
Conclusion
In conclusion, cleaning the crumb tray of your toaster is a simple yet essential task that ensures optimal toaster performance and prevents potential hazards. By following the proper steps to remove and clean the crumb tray regularly, you can enjoy delicious and crumb-free toast while prolonging the life of your appliance.
Remember to prioritize safety, unplug the toaster, and let it cool before cleaning. With a clean crumb tray, you’ll be well on your way to a hassle-free toasting experience and a well-maintained toaster for many breakfasts to come. Happy toasting and cleaning!